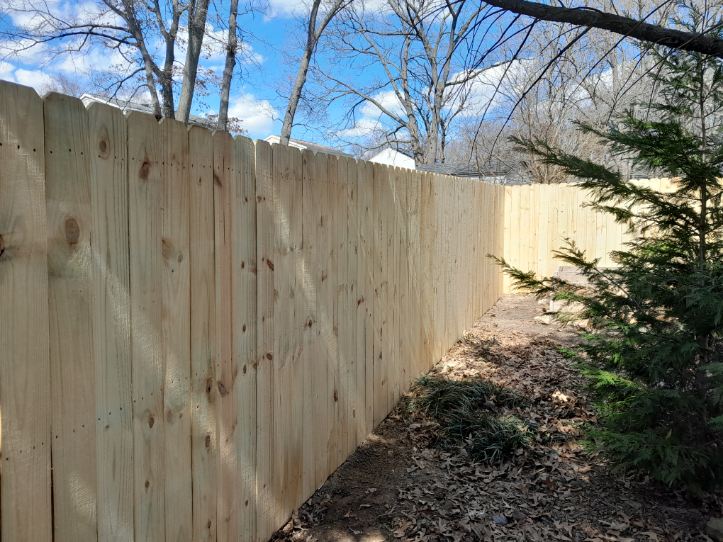
Wood fence staining is a great way to preserve your fencing and maintain its rich color. Most fences need to be stained every 2-3 years for proper maintenance, but that changes based on the type of wood posts you have and the amount of rain you get throughout the year. In this guide, we will explain how to stain wood fencing to get the longest life out of your investment.
Prepare the Wood Fence for Staining
Before you stain your fence, it’s important to remove the old finish that remains on the post. This will create a clean surface for the new stain to grip onto, and it will maximize the life of the stain. Most wood fences can be power washed, but older fences may not be able to withstand the pressure of the hose. This is important to do before beginning your wood fence staining project.
As an alternative, you can use a wood fence cleaning solution that can be washed off with a garden hose. There are other cleaners available that you scrub into the fencing to strip off the exterior finish. Finally, you could sand down the wood to get rid of the old finish, but you must be careful not to sand down too much. This would do as much damage as power washing and may require you to get your fence repaired.
This is a good time to repair any broken, missing, or damaged fence panels that you have so the stain can go on smooth and even. You can use nails, screws or wood glue for most fence repairs, or you can talk to a fence installation company if specialty repairs need to be made.
Work with a Dry Surface
Your fence must be completely dry before you apply the stain. Otherwise you will trap moisture into the fence posts that will cause them to warp, crack or break apart. Wait at least 24-48 hours after washing the fence to apply the stain. If it has rained recently, you will need to wait the same amount of time before applying the stain. Also keep in mind what the weather is like for the next few days. If there is a chance of rain, wait until you have several days of dryness before staining your fence.
Select the Right Wood Fence Stain
In most situations, we recommend exterior semitransparent oil stain for wood fence staining. This enhances the color and grain of the wood while protecting it from moisture. You can choose a natural stain that looks similar to the wood’s original color, or you can choose to change the color based on the stain’s hue. Whatever you select, make sure it comes with UV inhibitors. These will protect the fence from sun damage and preserve the color as much as possible.
If you have some extra fence posts from your fence’s original installation, you can bring one with you to test stains on. This will give you the best indication of what the stain will actually look like. If you do not have scrap wood, look for samples of the stain on cedar boards. This is the material most stain samples are put on, and it should give you an idea of how the stain will look on fencing (even if your fence is not made of cedar).
Wood Fence Staining Application
To apply the stain to the fence, use a pain roller with a medium nap texture. Apply the stain from top to bottom, following the grain of the wood. Work in three foot sections, coating one section completely before moving on to the next one. Once you have rolled everything on, go over it with a paintbrush to work the sealant into the wood. You can also use a paint brush to apply stain in areas where the roller cannot reach.